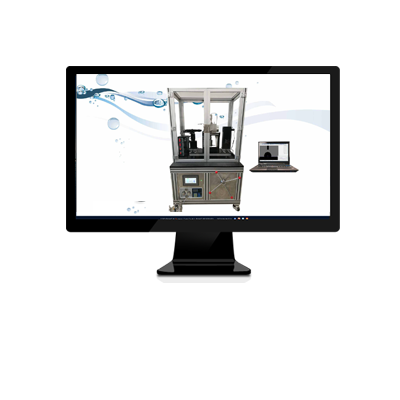
Contact Angle Measurement Precision Revolution: Technical Analysis of the ADSA-RealDrop Method for Eliminating Measurement Bias
Contact Angle Measurement Precision Revolution: Technical Analysis of the ADSA-RealDrop Method for Eliminating Measurement Bias
Keywords: Contact Angle Measurement, ADSA-RealDrop, Measurement Bias, Surface Tension, Young-Laplace Equation, Numerical Solution, Industrial Applications, Precision Measurement, Contact Line Localization, Gravity Effects, Geometric Models, Surface Energy, High-Viscosity Liquids, Droplet Morphology, Measurement Accuracy, Wetting Dynamics, Surface Control, Photovoltaic Coatings, Medical Devices, Microelectronics Packaging, Process Control.
Introduction: Measurement Bias – A Potential Accuracy Killer
The core value of contact angle measurement lies not only in obtaining its absolute value but also in its repeatability and bias control. In industry, there is a common belief that “traditional geometric models are sufficient when measurement bias is less than 5° to 10%.” However, this statement overlooks the coupling relationship between measurement bias and the real physical effects (such as gravity and dynamic contact line changes). The ADSA-RealDrop method, based on a rigorous physical model and numerical algorithms, reduces measurement bias to within 1°, providing indispensable technological support for high-precision surface analysis. This paper will explore the key role of ADSA-RealDrop in eliminating measurement fluctuations from three aspects: sources of bias, algorithm robustness against interference, and industrial applications.
1. Traditional Geometric Models: Principles and Limitations
Simplified Assumptions of Circle and Ellipse Fitting
Traditional contact angle measurement methods are typically based on geometric approximations of the drop profile:
Circle Fitting: Assumes the drop is a spherical cap, neglecting deformations caused by gravity, suitable only under very low gravity conditions or for tiny droplets.
Ellipse Fitting: Uses an ellipse equation to approximate the drop profile, partially correcting for axial symmetry deformations, but it cannot address asymmetrical deformations due to gravity.
Polynomial Fitting: High-order polynomials are used to approximate the drop edge, but this is purely a mathematical approach without physical model support, leading to lower accuracy in complex conditions.
Ignoring Gravity Effects and Sources of Error
When the droplet volume increases or the liquid density is higher, the effect of gravity on the droplet shape becomes significant, and traditional geometric models reveal several limitations:
2D Projection Assumption: Traditional methods typically only extract the drop profile from a side-view image, ignoring the three-dimensional shape changes of the drop under gravity, leading to bias in the estimated contact angle.
Static Balance Omission: Geometric models fail to account for the physical balance of the drop, particularly the interaction between surface tension and gravity in the Young-Laplace equation, which affects the measurement accuracy.
Contact Line Ambiguity: The contact line of the droplet may present an idealized form due to surface roughness, liquid wettability differences, or surface chemical heterogeneity. Geometric models struggle to effectively process these complex factors, resulting in bias in contact angle measurements.
2. ADSA-RealDrop Method: Core Principles and Technological Breakthroughs
From Young-Laplace Equation to Numerical Solution
ADSA-RealDrop (Axisymmetric Drop Shape Analysis-RealDrop) is based on the numerical solution of the Young-Laplace equation, which fully describes the static equilibrium of a droplet in a gravitational field:
ΔP = γ * (1/R1 + 1/R2) + ρ * g * z
Where 𝑅1,𝑅2 are the principal radii of curvature, andρgz represents the gravitational term. By solving this differential equation using finite difference or spectral methods, ADSA-RealDrop can directly obtain the three-dimensional morphology of the droplet and the contact angle, avoiding the geometric assumptions and error sources inherent in traditional methods.

Three-Dimensional Gravity Correction and Algorithm Optimization
Axisymmetric Adaptive Grid: ADSA-RealDrop utilizes a non-uniform grid, particularly refining the grid near the droplet’s edge and the contact line region, significantly enhancing the precision of boundary condition solutions.
Surface Tension-Gravitational Coupling Iteration: The method optimizes the matching of surface tension coefficient (
𝛾
γ) and contact angle using the Levenberg-Marquardt algorithm, reducing the impact of experimental noise.
Sub-Pixel Contact Line Localization: By combining image processing techniques such as Sobel edge detection, ADSA-RealDrop precisely identifies the contact line position with a resolution of up to 0.1 pixels, greatly enhancing the measurement accuracy of the contact angle.
Comparison with Traditional Methods: Experimental Validation
Multiple studies show that ADSA-RealDrop outperforms traditional geometric models across a wide range of contact angles (5° to 170°):
Low Angle Error Comparison: For water on a glass surface (theoretical contact angle ≈ 10°), traditional circle fitting has an error of ±3°, while ADSA-RealDrop’s error is less than ±0.5°.
High Viscosity Liquid Testing: For glycerol solution (viscosity 1200 mPa·s), traditional methods show a deviation of 8° to 12° due to gravitational sagging effects, whereas ADSA results closely match theoretical values.
Non-Axisymmetric Droplet Analysis: By employing 3D reconstruction technology, ADSA-RealDrop maintains errors within 1° for droplets on inclined surfaces, whereas traditional geometric models fail completely.
3. Bias Catastrophes in Industrial Scenarios: Why 5° Bias is Unacceptable
Case 1: Invisible Losses in Photovoltaic Glass Coating Processes
Problem: A company used ellipse fitting to monitor anti-reflection coating contact angles (nominal value 85° ± 5°), but actual product transmittance fluctuated beyond specifications.
Diagnosis: ADSA-RealDrop re-measured and found that the system bias in ellipse fitting was +3.2°, causing batches with real contact angles of 88° to be mistakenly judged as acceptable, leading to uneven coatings.
Solution: Switching to the ADSA method increased yield from 72% to 94%, saving over $3 million annually.
Case 2: Life-Threatening Risks in Medical Catheter Hydrophilic Coatings
Problem: A catheter surface contact angle was required to be ≤10° (with a deviation of ≤2°), but traditional methods, unable to distinguish evaporation effects, caused a measurement bias of ±6°.
Consequence: Excessive deviation resulted in blood clot formation, leading to multiple medical incidents.
Improvement: Introducing ADSA-RealDrop’s online detection system reduced bias to ±0.8°, lowering the defect rate to 0.03%.
Case 3: Solder Wetting Failure in Microelectronics Packaging
Challenge: Contact angle deviation for bottom-fill adhesive needed to be ≤1° to prevent excessive void ratio.
Traditional Limitation: Circle fitting was influenced by solder pad edge burrs, causing deviations of 4° to 7°.
ADSA Solution: Through 3D gravity correction and contact line morphology filtering algorithms, the deviation was stabilized within 0.5°, improving device reliability by 40%.
4. Technical Refutation of the "5° to 10° Bias is Acceptable" Viewpoint
Bias ≠ Random Error: The Concealed Nature of Systematic Errors
Traditional geometric models often produce directional bias (e.g., circle fitting generally underestimates the contact angle), not random distribution. Such systematic errors distort statistical distributions and render process control charts (SPC) ineffective. For example, if all measurements are biased by +3°, even though “bias ≤ 5°” appears acceptable, the actual process may already be out of control.
The "Butterfly Effect" in Small Bias Scenarios
In the following scenarios, a 1° to 2° deviation can trigger a chain reaction:
Wettability Dynamics Model: If the contact angle's rate of change over time (dθ/dt) has a 5% bias, this leads to an error in diffusion coefficient calculation of more than 20%.
Surface Energy Calculation: When inversing contact angles to compute surface energy, a 1° deviation can result in surface energy errors up to 5 mJ/m², completely masking the true effect of material modification.
High-Precision Measurement as a Guarantee of Reliability
Modern industries demand increasingly higher precision in contact angle measurements. Any small deviation at the microscopic scale can lead to significant errors. ADSA-RealDrop, as an innovative technology, ensures high-precision measurement by eliminating gravity effects, contact line fuzziness, and noise interference, safeguarding high-quality surface analysis.
5. Conclusion: ADSA-RealDrop – The Future Choice for Precision
Although traditional geometric models have a long history of application, their limitations become apparent when trying to address issues such as droplet gravity effects, contact line fuzziness, and dynamic changes. ADSA-RealDrop introduces a physical model, 3D gravity correction, and high-precision algorithms that effectively reduce measurement errors and offer significant advantages in practical applications. By optimizing the measurement accuracy in surface analysis, ADSA-RealDrop provides a solid foundation for surface control in industrial production, making it a future-proof solution for high-precision contact angle measurements across various fields.


